
This process strikes a perfect balance—not the bare minimum you could do, nor the absolute maximum—but exactly what I personally use to keep my shoes looking their best. By the end of this article, you’ll have the skills, techniques, and product knowledge to maintain your leather shoes like a pro and enjoy the meditative satisfaction of caring for your footwear.
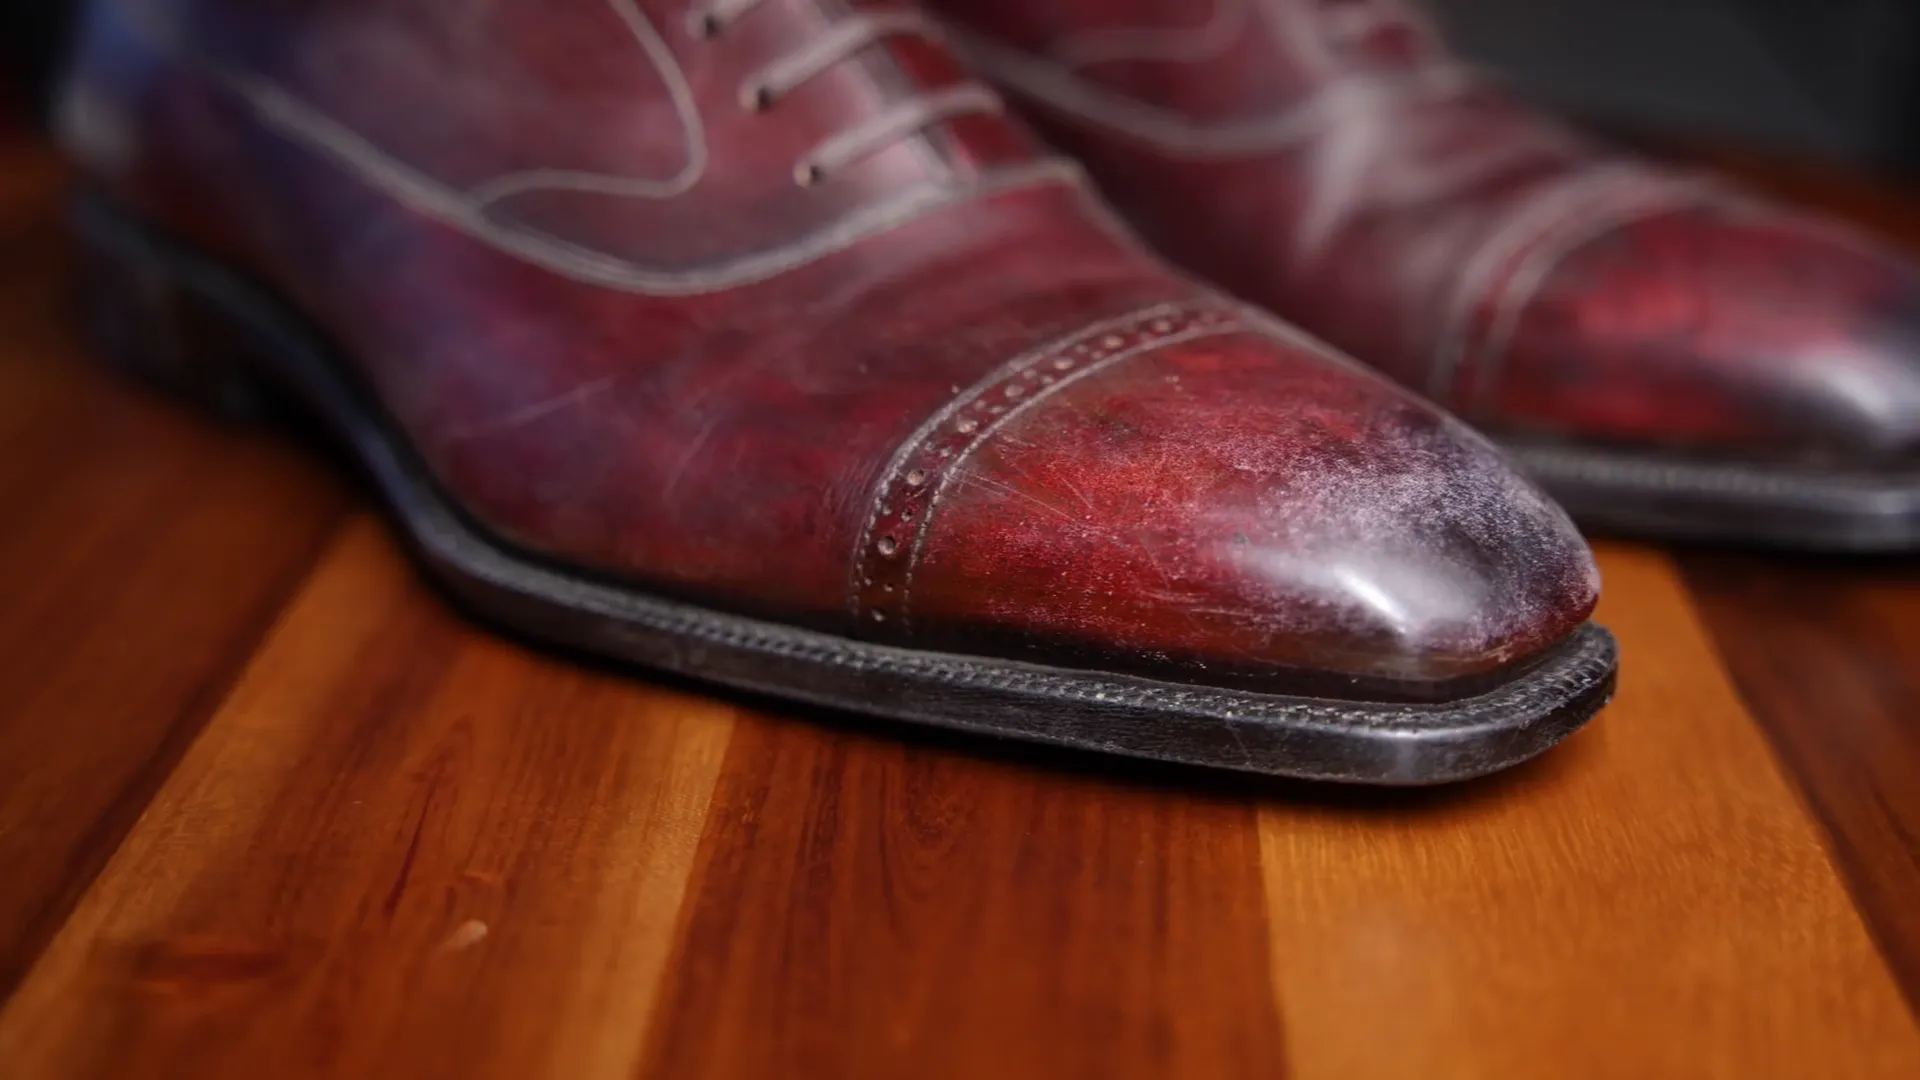
Table of Contents
Tax Fraud 💼
Okay, before we dive into the shoe care steps, let’s quickly talk about the real “tax fraud” here: the money and time wasted on shoe maintenance when you don’t do it yourself! I used to take my shoes to the local cobbler once a month, which involved multiple trips and quite a bit of time and expense. When you break it down, the costs are surprisingly high.
Each trip to the cobbler was about 10 minutes plus 7.3 miles one way, meaning 20 minutes and 14.6 miles round trip. Since I had to make two trips per month—one to drop off and one to pick up—that’s 60 minutes and 29.2 miles monthly just for shoe cleaning. Over a year, that’s 350.4 miles driven. With my car averaging 26 miles per gallon and gas prices factored in, this translated to about $48 per month or $576 annually spent purely on fuel.
But time is even more valuable. Using an average salary figure for Denver of $80,000 and dividing by an average 280 working hours per month, my hourly rate was roughly $384. Taking an hour out of my day for shoe maintenance cost me an additional $461.52 per year in lost productivity.
Combine fuel and time, and I was spending about $1,037.52 annually just to maintain shoes at the cobbler. And that’s before factoring in the quality of care or the condition of the shoes by the end of the month.
By contrast, my at-home care routine costs about $150 for products that last several years and takes just an hour every six months. This routine not only saves me nearly $1,000 a year but also keeps my shoes in impeccable condition daily. Now that’s what I call financial savvy shoe care!
1) Wipe 🧼
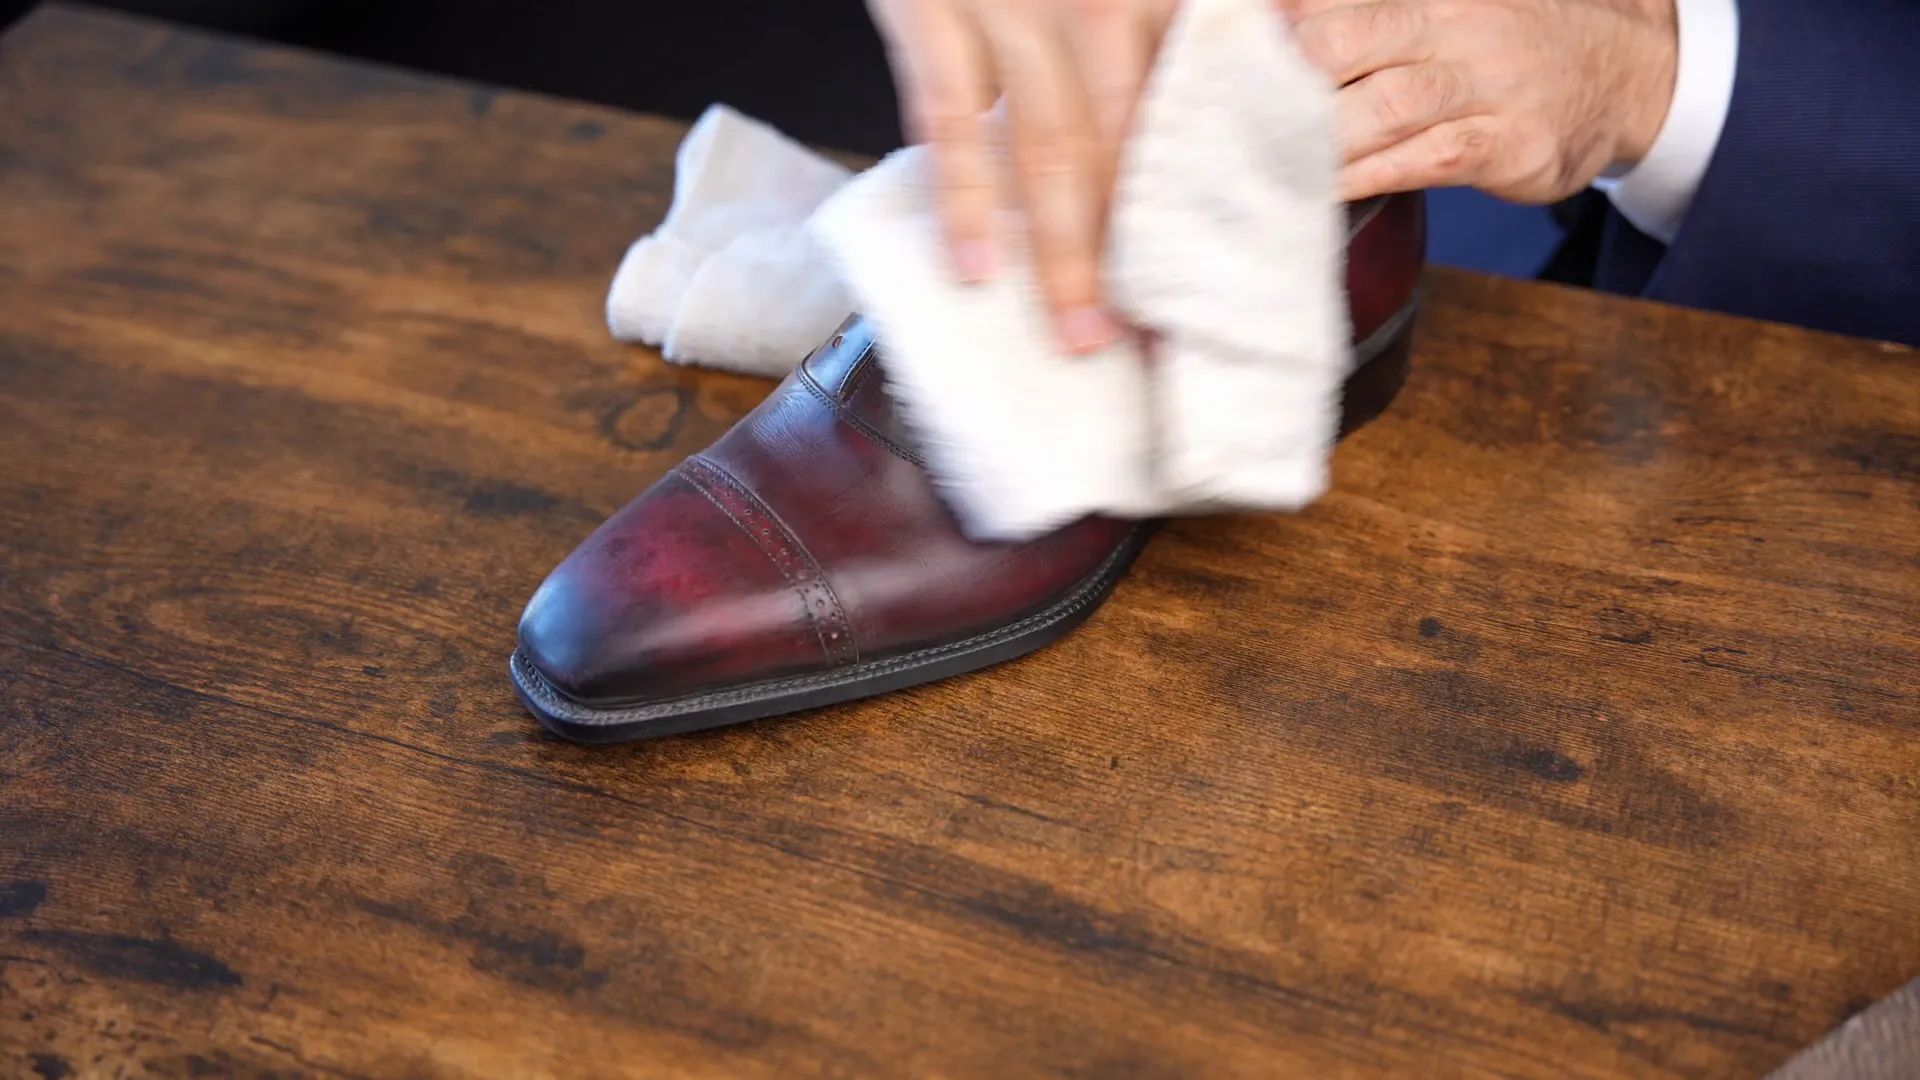
The first step in maintaining your leather dress shoes is simple but crucial: wiping off dust, dirt, and any loose debris. Leather is a porous material, much like the skin it originally came from, so it’s essential to start with a clean surface before applying any creams or waxes.
Here’s how I do it:
- Grab a clean, soft cotton towel. I prefer something that’s absorbent but gentle, like old t-shirts cut into strips.
- Wet the center of the towel under a faucet and wring it out thoroughly. The goal is a slight dampness—just enough to lift dirt without soaking the leather.
- Ensure the towel doesn’t feel wet but rather cool to the touch. This minimal moisture avoids damaging the leather’s pores.
- Gently glide the damp towel over the shoe’s surface once to remove larger, looser particles that might scratch the leather if pressed too hard.
- Use a clean section of the towel to make a second, more thorough pass to pick up any remaining debris.
- Don’t forget to wipe the heel block, sole edge, and welt. I usually fold the towel edge to reach into crevices, but a soft brush works too.
- Finally, wipe the sole and heel, especially if you wear your shoes indoors.
After wiping, let your shoes dry for about 10 minutes before moving on to the next step. This gentle cleaning removes surface grime and prepares the leather to absorb conditioning products effectively.
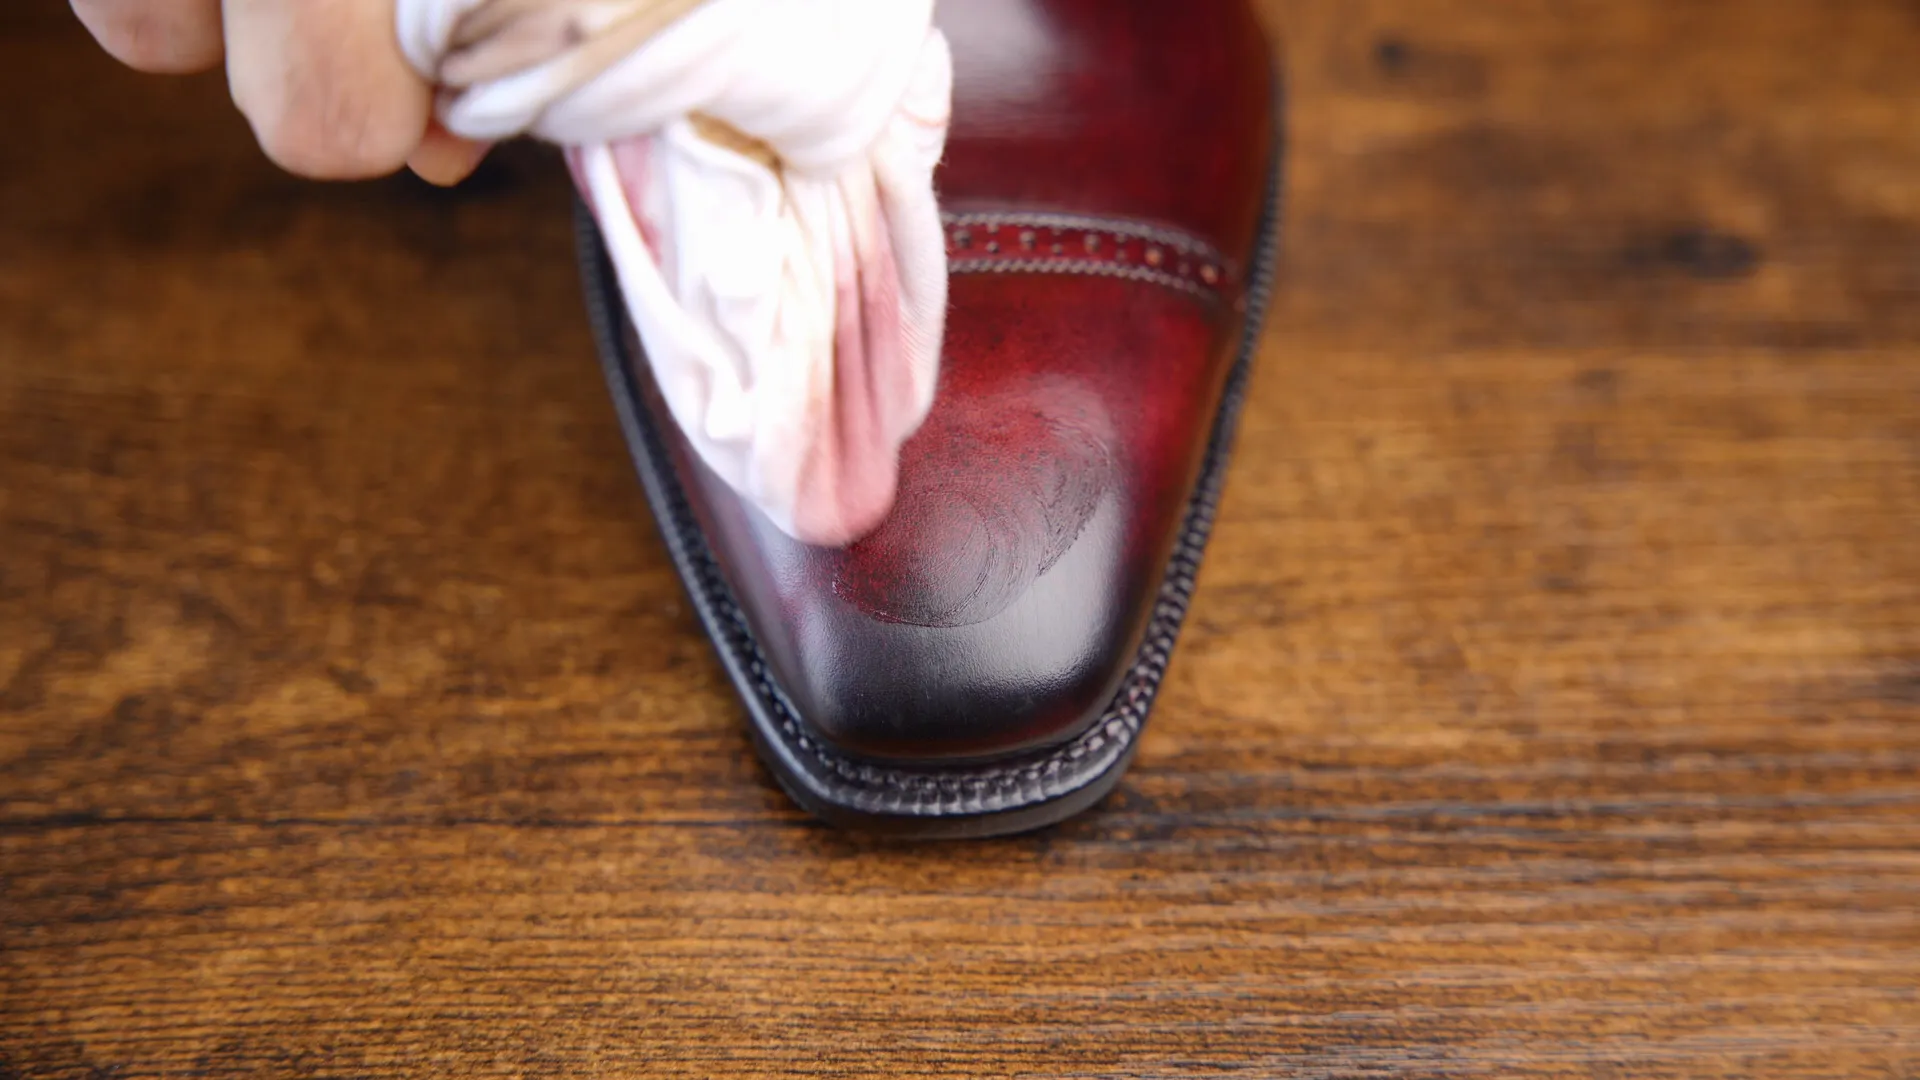
2) Clean 🧽
Now that your shoes are free of surface dirt, it’s time to clean deeper—to clear the leather’s pores of oils, micro dirt, and old wax layers that can clog it and prevent proper absorption of conditioning products.
I use a product called Reviving Cream from the Swedish shoe care company Paul Brungard. This cream is gentle, effective, and risk-free, making it ideal for regular use. While there are more intense cleansers like Renomat, they can strip color if you’re not careful, so I save those for occasional deep cleans.
Applying the cream properly takes a bit of technique:
- Cut a strip of soft cotton cloth about 18 inches long. Old t-shirts work perfectly and are cheap to replace.
- Wrap the cloth snugly around your index and middle fingers to create a taut surface. This tight wrapping allows for precise pressure and control.
- Dab a small amount of the cream onto the cloth and rub it into the shoe using small circular motions.
- Work in patchwork fashion, starting at the toe and moving down to the heel. The cream also acts as a mild conditioner, so you can apply firm pressure to work it into the leather.
- Rub each section until the cream fully disappears, avoiding letting any product sit on the surface, which can cause discoloration over time.
- If the cloth picks up a lot of grime, switch to a clean section halfway through the shoe.
- Once the entire shoe is treated, let it rest for 5 minutes to absorb.
- Brush thoroughly with a horsehair brush to remove excess cream and evenly distribute what remains, especially in crevices.
Horsehair brushes are ideal because they’re stiff enough to spread and remove product but soft enough not to damage the leather. After brushing, let your shoes dry for at least an hour—overnight if possible—to allow the cream to fully penetrate.
This cleaning process saturates the leather, so it’s important to be patient and not rush through drying. I typically spread this routine over 2-3 days, spending just 10-20 minutes each day, which fits easily into my schedule.
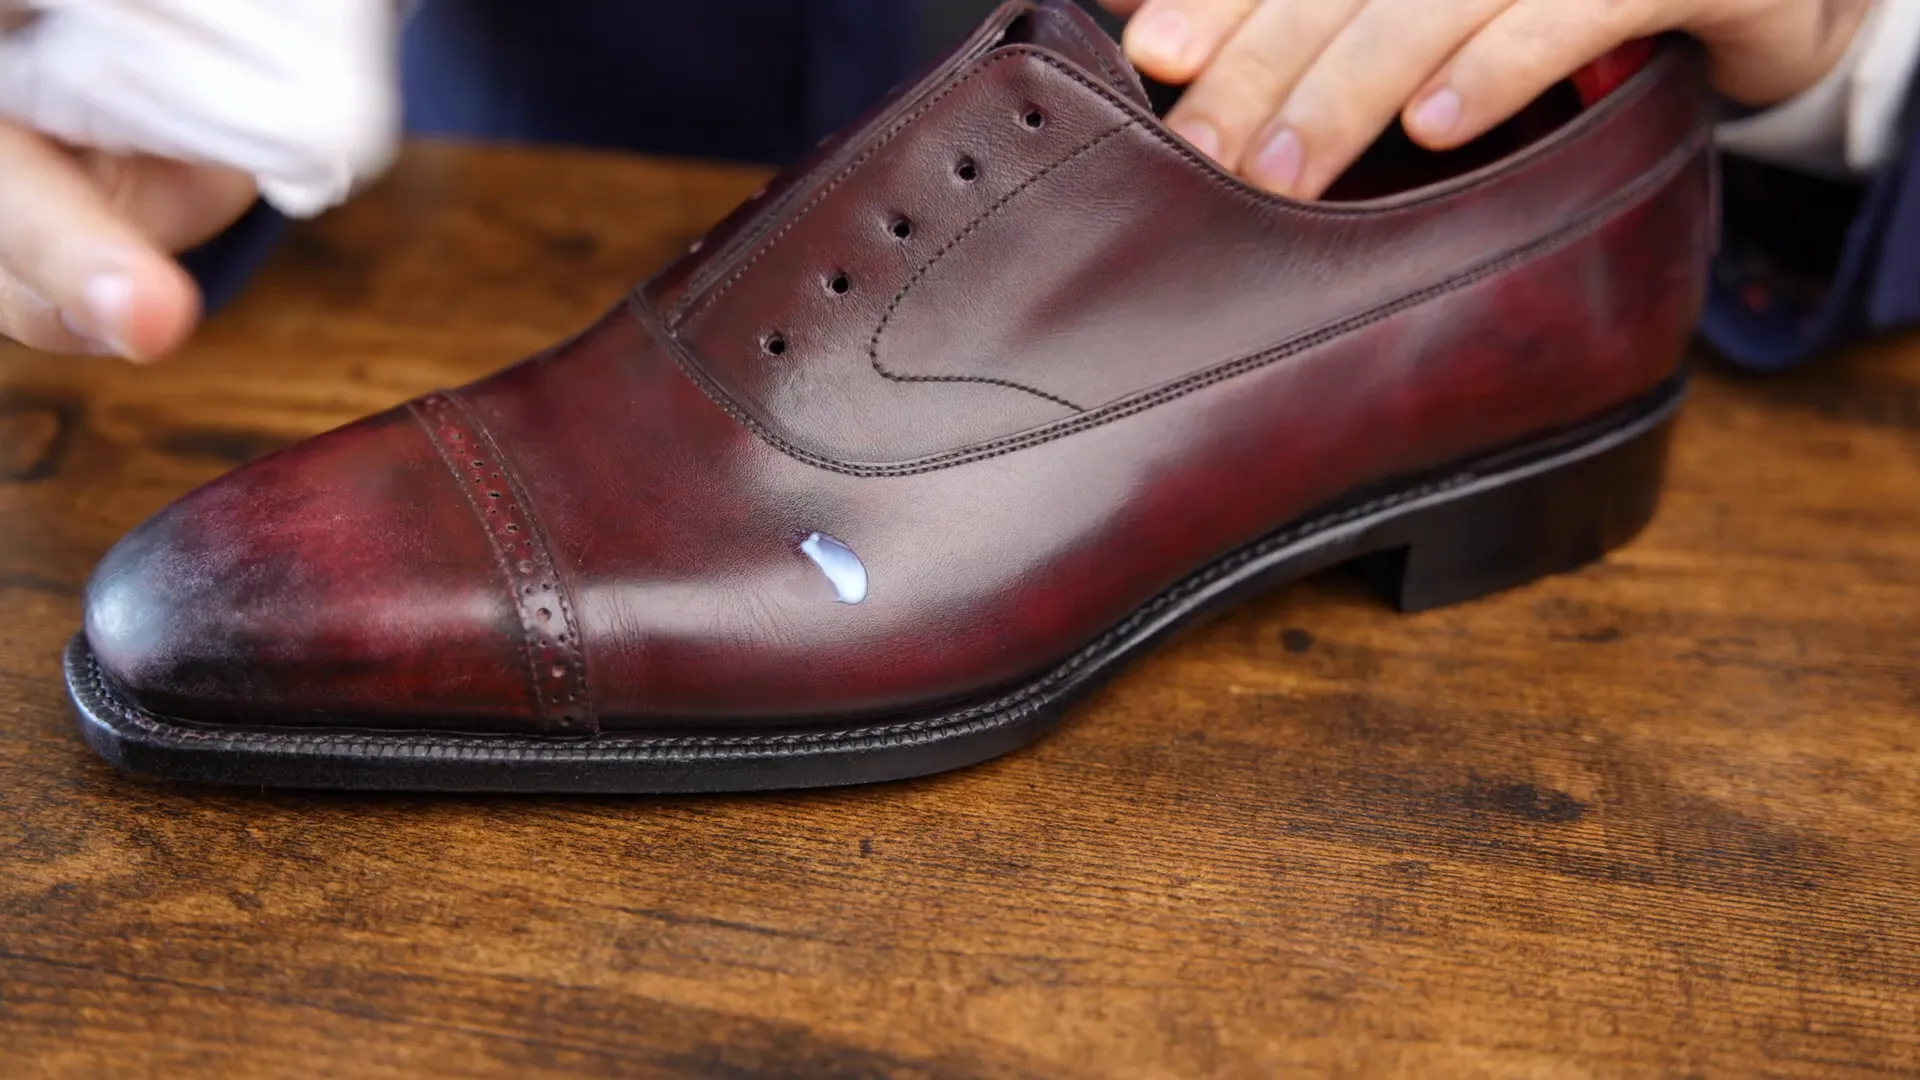
3) Condition 💧
Cleaning is just the start—conditioning is the heart of leather shoe care. Conditioning hydrates and lubricates the leather’s natural fibers with oil-based substances, preserving flexibility and enhancing the rich, saturated color.
My favorite conditioner is Renovator from the French company Saphir, often called the “white gold” of shoe care. It’s a mink oil-based conditioner used by top shoemakers and cobblers worldwide and contains soft waxes that give a gentle shine when brushed. For those seeking animal-free alternatives, there’s a macadamia nut-based version with similar benefits.
The application process is similar to cleaning but with a key difference:
- Instead of using a cloth wrapped around your fingers, apply the conditioner directly with your bare fingers. This allows for acute pressure and better penetration.
- Use firm pressure to work the oil thoroughly into the leather, ensuring even distribution.
- Let the conditioner set for 10 minutes.
- Brush again with long, unidirectional strokes to maximize evenness. In areas like the vamp, toe, and heel, I brush in multiple directions to cover every spot.
- Always finish brushing with strokes going front to back.
Because the conditioner includes soft waxes, it’s important to maintain long brush strokes to produce an even shine. Short, stunted strokes can bend the bristles and create uneven gloss.
The aesthetic shine you develop here isn’t just about looks—it sends a message. It telegraphs to clients, colleagues, and business partners that you take meticulous care in yourself and your work, fostering trust and respect.
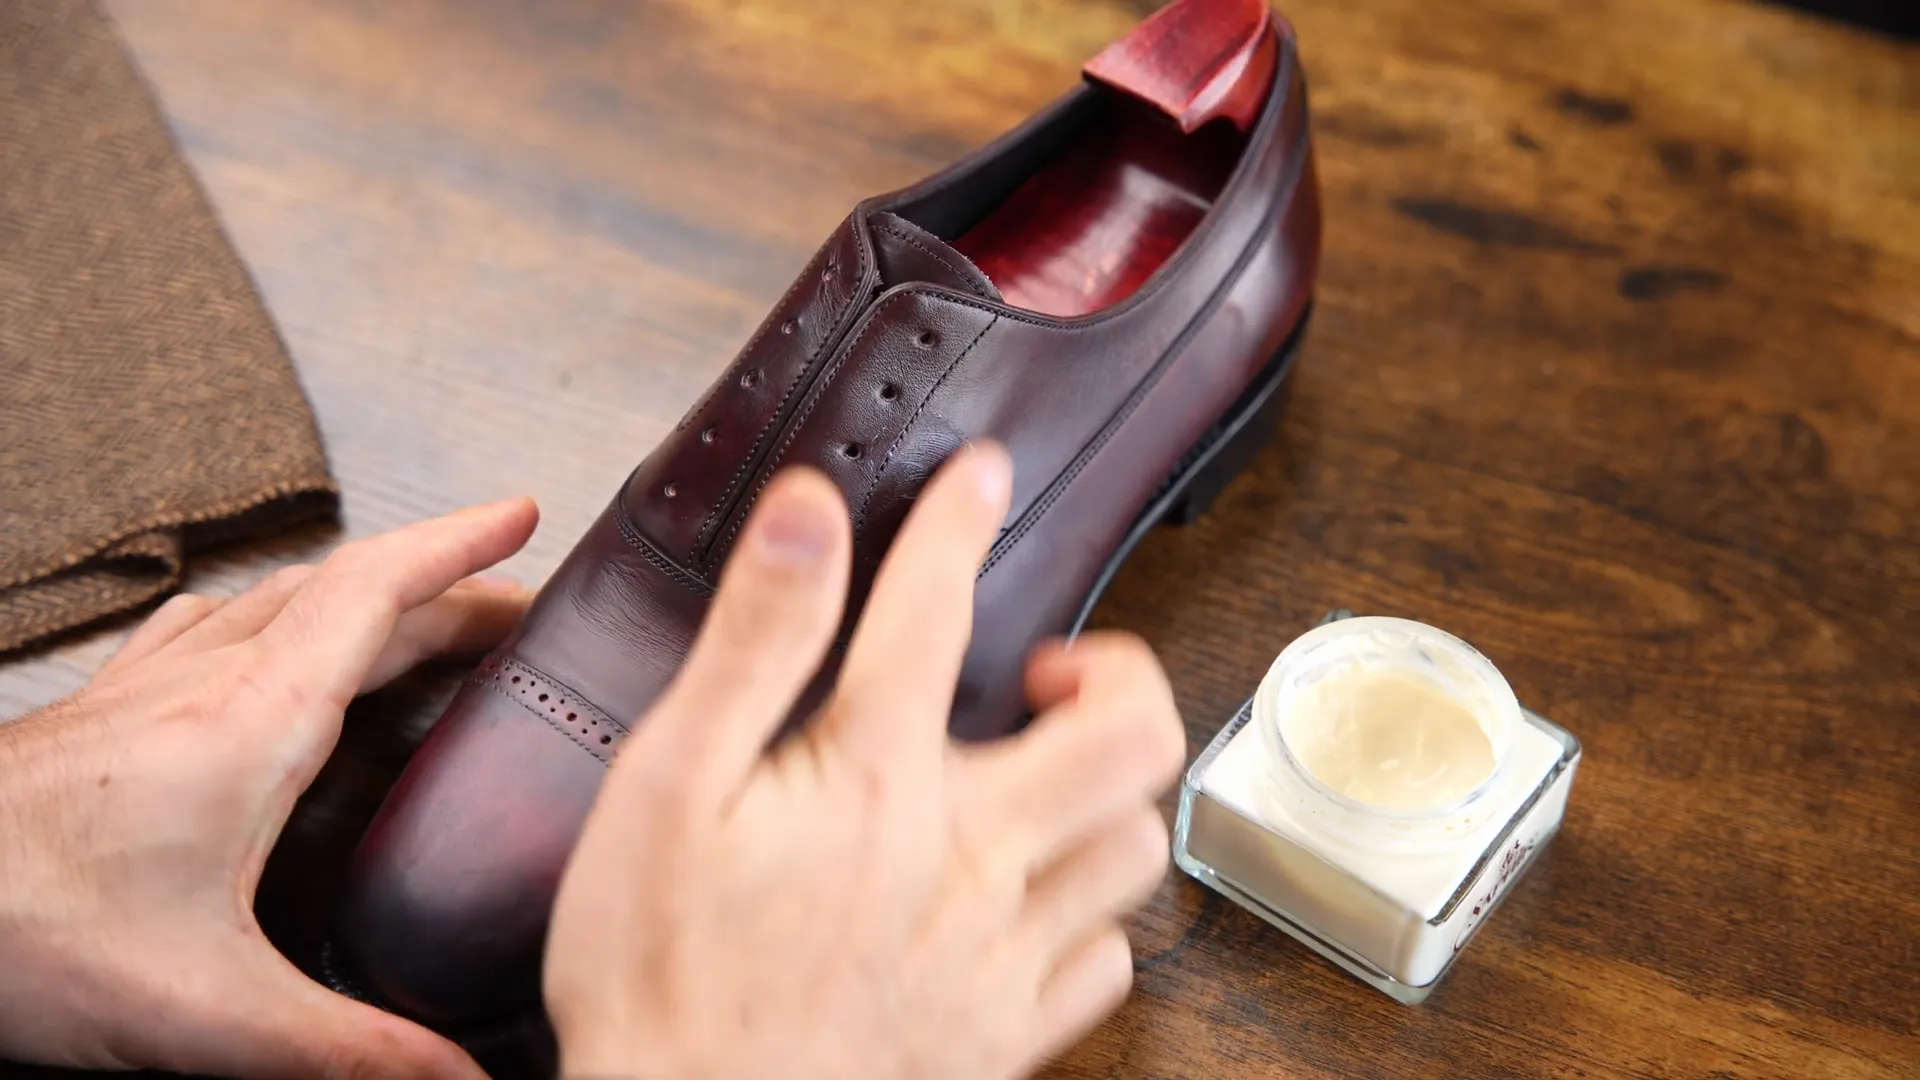
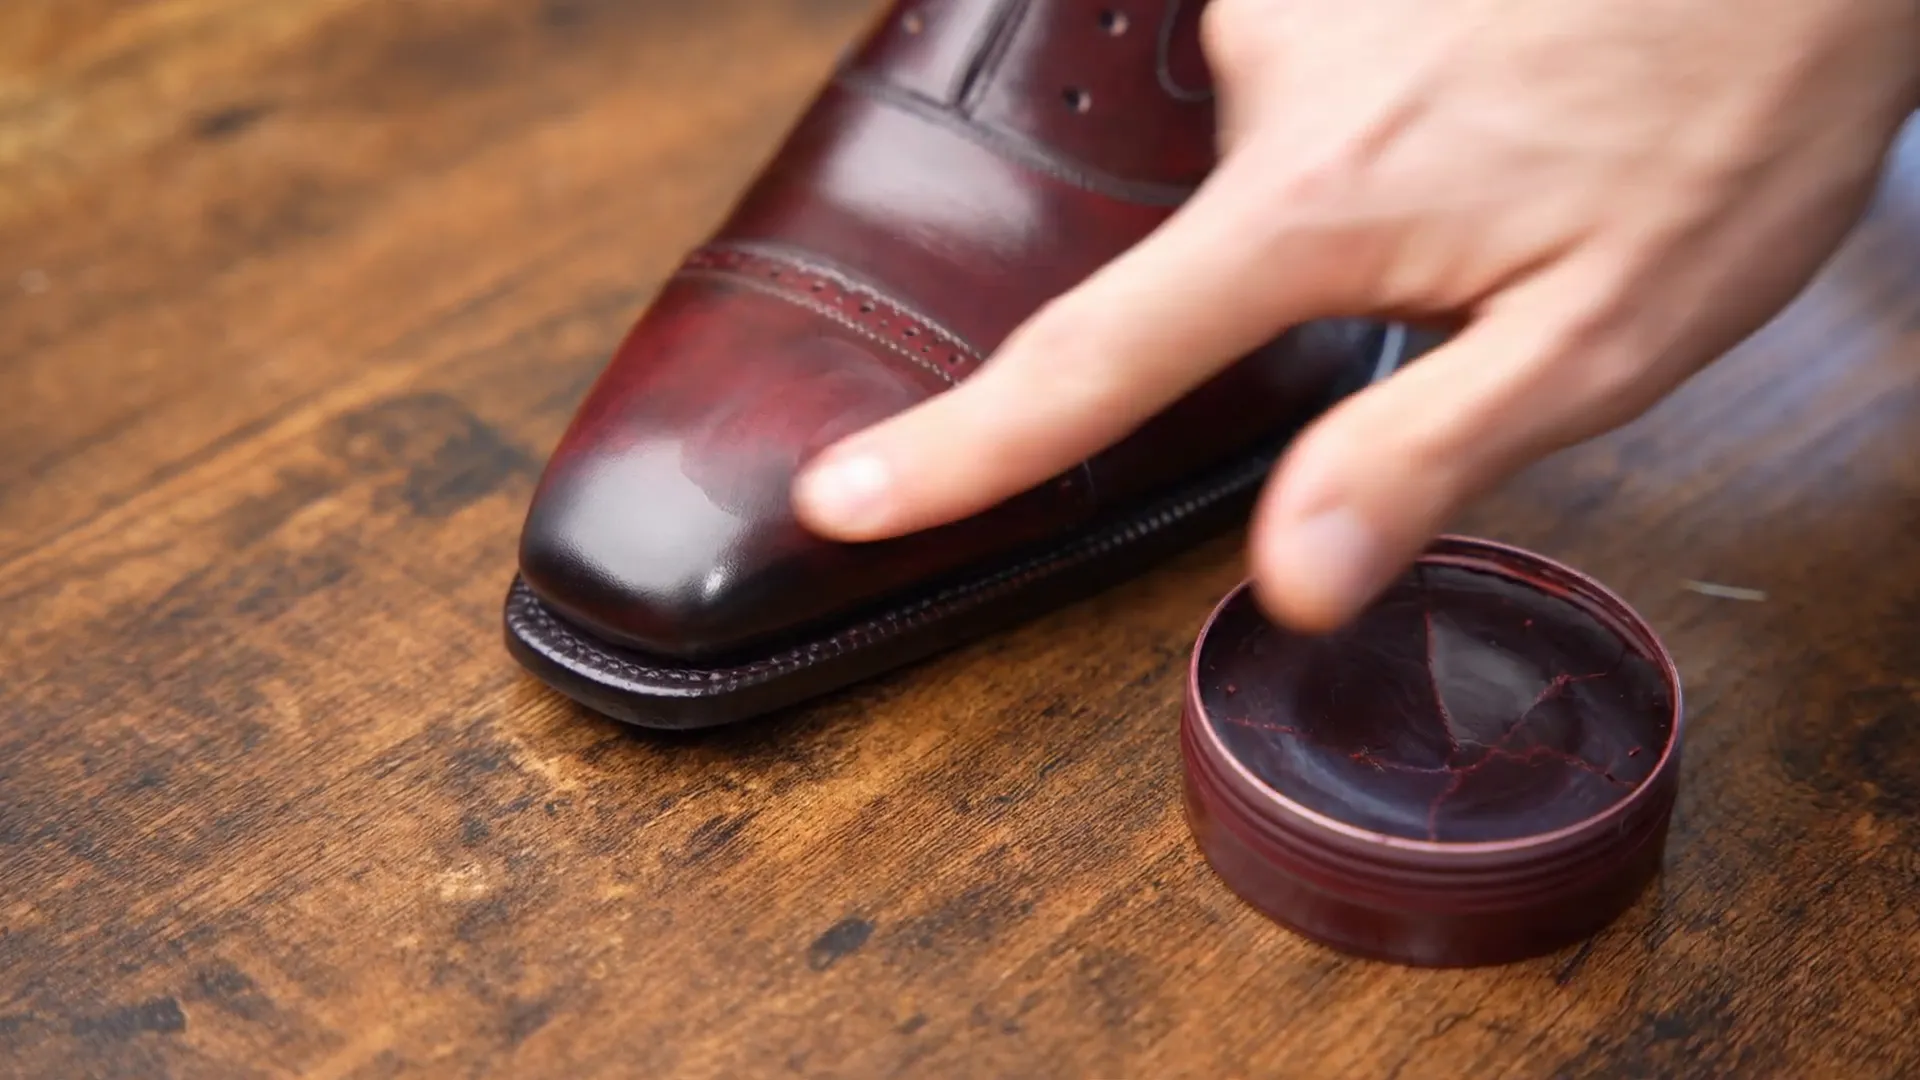
4) Color 🎨
Leather color naturally fades over time, especially on the sole edges and heel blocks, which wear off simply from walking. Restoring that rich, fresh color is essential to keep your shoes looking their best.
This is where cream polish comes in. Similar to conditioner, cream polish is oil-based but with a higher wax content and most importantly, dyes. It’s designed to restore and enhance the color without the aggressiveness of leather dye.
Here’s how I apply cream polish:
- Use a thin cloth to apply the polish in thin, even layers. I typically use a similar quantity as the conditioner but adjust based on how much color restoration is needed.
- Apply in multiple thin layers rather than one heavy coat to avoid patchiness and discoloration.
- Don’t forget the sole edges and heel blocks—these areas often get neglected but are vital for a polished look.
- Be aware that cream polish will stain your fingers even with a cloth. It’s not permanent and usually wears off in a day or two. You can speed this up by rubbing with isopropyl alcohol (water won’t work).
- If you want to avoid staining altogether, use basic nitrile gloves.
- Let the polish dry for 10 minutes, then brush to set the color and develop a soft, glowing shine.
At this stage, your shoes are structurally maintained, color restored, and have a moderate protective wax layer from the cream polish. This restoration can last several weeks or even a couple of months.
5) Wax 🕯️
If you want to extend your shoe care results to last up to six months, applying wax is the final and most important step. Wax creates a protective film over the shoe’s surface, preventing environmental oils, salts, and water from penetrating deep into the leather pores.
Wax also seals in the conditioner, increasing its longevity and enhancing waterproofing, especially on the sole edges—a bonus for rainy or snowy days.
Here’s my waxing routine:
- After letting the shoes dry for at least an hour or overnight from the conditioner and polish, apply a thin layer of wax all over the upper shoe.
- If you want extra protection and shine, wait 5 minutes and apply a second thin layer. Avoid more than two layers to prevent the wax film from becoming too thick and causing unsightly cracks.
- Wax sits on the surface, so even distribution isn’t critical. I prefer using my fingers for application to get tactile feedback and control.
- Because wax is colored, be mindful that even small amounts can cause slight discoloration, but this is minimal and manageable.
- Finish by applying one or two layers of wax on the sole edge and heel block.
- Let the wax sit for 10 minutes, then give the shoes a thorough brush to develop a higher glowing shine.
This final step produces a subtle yet impressive shine that doesn’t scream for attention but signals quality and care when noticed. Despite its simplicity, this routine is so thorough that you may not need to repeat it for another six months.
Math Math Math 🧮
Let’s revisit the numbers to highlight just how much money and time you can save by doing your own shoe care.
Before I started this DIY routine, monthly visits to the cobbler cost me:
- 60 minutes of travel and waiting time per month (two trips)
- 29.2 miles driven monthly
- $48 per month in gas alone, equating to $576 annually
- $461.52 annual cost in lost time productivity (based on average hourly wage)
In total, I was spending over $1,000 annually just on shoe maintenance outside the home.
Now, consider the costs of my at-home routine:
- $150 for all shoe care products (creams, waxes, brushes), which can last up to 5 years (let’s be conservative and say 3 years)
- This breaks down to about $50 per year on supplies
- The process takes about 1 hour of cumulative work every 6 months for two pairs of shoes
- Additional brushing and minor touchups are quick and can be factored as minimal time or equivalent to the inconvenience of leaving the house
When you add it all up, I save approximately $957.78 per year by doing my own shoe care, not to mention the added benefit of keeping my shoes in absolutely pristine condition day after day.
Plus, I genuinely enjoy the process—it’s meditative and rewarding.
If you want to customize your own shoe care routine, whether a bare minimum or an extravagant maximum, I recommend exploring comprehensive guides that cover all levels of shoe care products and techniques. Tailor the process to your lifestyle and shoe collection, but know that even a middle-of-the-road approach like mine delivers excellent results and savings.
Conclusion
Maintaining your leather dress shoes doesn’t have to be expensive or time-consuming. With a thoughtful, step-by-step routine focusing on wiping, cleaning, conditioning, coloring, and waxing, you can keep your shoes looking brand new every day while saving nearly $1,000 annually.
This process not only preserves the structural integrity and appearance of your shoes but also enhances your personal presentation—signaling attention to detail and professionalism to everyone you meet.
Investing a little time and effort into your shoe care routine pays off handsomely in the long run, both financially and in satisfaction. Plus, it’s a meditative ritual you might come to enjoy.
So grab your favorite dress shoes, gather your supplies, and start treating your leather with the care it deserves. Your shoes—and your wallet—will thank you.


